Categories

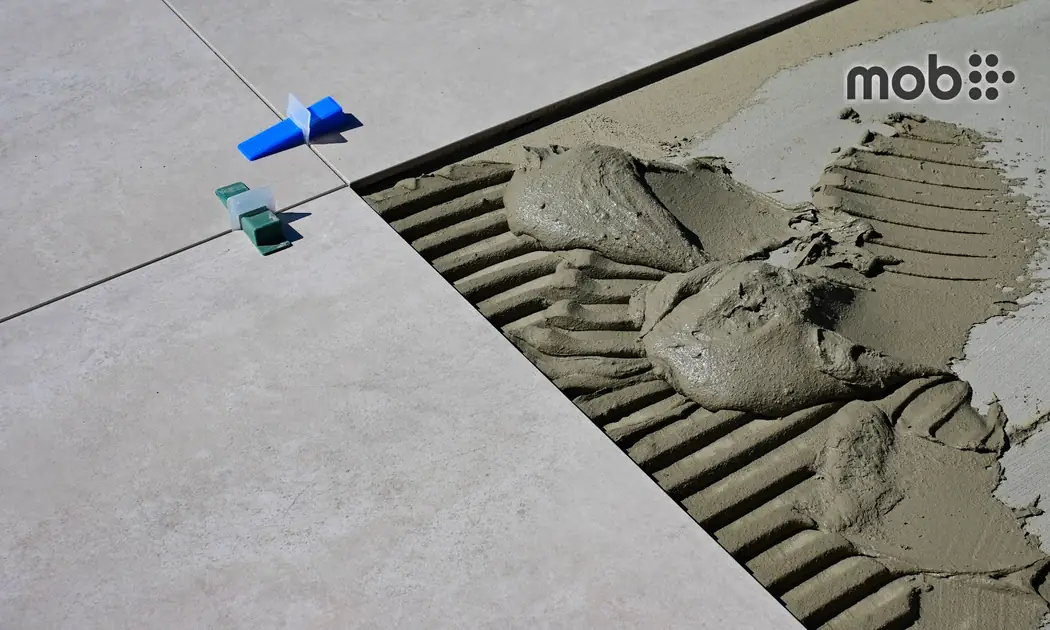
For any vitrified tile floor laid in Bengaluru, the 2mm spacer wins every single time. Paper joints, where tiles are jammed edge to edge with zero gap, look sleek in a showroom catalog but are the direct reason floors tent up, crack, and pop off the screed during December and January.
A paper joint leaves no room for thermal movement. Vitrified tiles absorb virtually no water and expand and contract at a completely different rate than the concrete slab underneath. When the temperature swings, the tiles push against each other with tons of lateral pressure until the weakest bond breaks and an entire row arches upward like a pitched roof.
If your site supervisor or mistri claims that paper jointing is standard because it looks seamless, stop the work. A hairline spacer filled with an elastic, polymer-modified grout is the only engineering detail that keeps large-format tiles glued flat across seasonal weather shifts.
The physics of the December floor pop in Bengaluru
Bengaluru does not freeze, but it has one of the sharpest diurnal temperature shifts in peninsular India during November, December, and January. Afternoon indoor temperatures can sit at 28 to 30 degrees Celsius, especially near south-facing glass balconies or west-facing sliding doors. By 4 AM, ambient outdoor temperatures drop to 14 or 15 degrees Celsius, chilling the building concrete frame.
Your concrete subfloor and your vitrified tiles react to this shift under two totally different rules. Vitrified tiles have a coefficient of thermal expansion around 6 to 7 microstrain per degree, while the reinforced concrete structure moves at roughly 10 to 12. Worse, the tile top surface cools or warms far faster than the 150mm thick structural slab buried underneath the screed.
When tiles cool down rapidly, they contract. When the sun hits them again, they push outward. If tiles sit hard against one another in a zero-gap paper joint, there is nowhere for that lateral thrust to go. The compressive stress builds up across the room grid until the bond strength of the bedding mortar fails. Once the shear stress exceeds the adhesive pull-off strength, the floor releases with a loud crack, lifting upward into a tent shape.
Where paper joints and 2mm spacer systems fail on site
Paper joints fail primarily under thermal movement and foundation settlement. Because the tile edges touch directly, any microscopic deflection in the slab or shrinkage in the underlying mortar bed translates into edge spalling. The sharp rectified edges of 600x1200mm or 800x1600mm vitrified tiles chip off into white chalky flecks under everyday foot traffic because point loads are transmitted across unyielding ceramic rims instead of cushioned grout lines.
Paper joints also fail under cleaning water. Household mopping water creeps into the micro-fissures between butted edges. Since the gap is too narrow for cement grout to penetrate deeper than a fraction of a millimeter, dirty water stagnates underneath the tile body. Over six months, this dissolves the thin cement paste, leading to hollow drumming sounds when walked on, followed by loose tiles.
A 2mm spacer system fails only when the execution is corrupted by lazy site habits. The most common site failure happens when workers insert cross spacers vertically instead of laying them flat, or worse, pull them out late and allow thick mortar lumps to dry in the joint. If the joint cavity is not scraped clean down to at least two-thirds of the tile depth before grouting, the grout sits like a shallow wafer on top and flakes away within weeks.
Spacers also fail if you grout them with rigid pure cement slurry instead of polymer-modified grout. A 2mm gap filled with unyielding, brittle material simply becomes a wider paper joint that still transfers lateral stress directly to adjacent tiles.
The fake substitution: white cement slurry in the joint
The most damaging substitution happening across Bengaluru residential interiors is using neat white cement slurry or dry white cement powder swept into tile joints instead of a packaged polymer-modified tile grout complying with IS 15477 or ISO 13007.
A mistri will take a handful of dry white cement, scatter it over the laid floor, sprinkle water, and squeegee it into the seams. It looks tidy for the first forty-eight hours. But neat white cement has zero elastomeric polymer content. As it hydrates and cures, it shrinks aggressively, pulling away from the tile edges and creating hairline channels for water entry.
Neat white cement cures into a brittle, glass-like wedge. When the tiles expand, the hardened white cement does not compress; it either shears the porcelain edge or pops out as powdery debris. If you are laying vitrified slabs, you must insist on factory-bagged tile grout containing redispersible polymers. The polymer bridges the micro-movement, absorbing lateral compressive force like a miniature shock absorber between every two tiles.
The missing perimeter gap along the skirting line
Even a 2mm spacer grid will tent up if you commit the second fatal site mistake: running the floor tiles tight against the masonry walls. Masonry walls and RCC columns are rigid structural boundaries. As the floor tile field breathes, the perimeter must be allowed to slide.
Every room exceeding three meters in width requires a minimum 6mm to 8mm expansion gap between the edge of the floor tiles and the plastered brick wall. Tile mistris hate this because it requires careful perimeter cutting. They prefer to butt the floor tile right against the wall plaster and then slap the 100mm skirting tile right on top.
When the floor expands, that edge presses against the brickwork like a hydraulic ram. With no perimeter release, the pressure shoots back into the center of the room, popping the middle rows. Always ensure the floor stops 8mm short of the wall. The wall skirting tile, which sits vertically, will easily cover that 8mm gap, hiding the movement buffer completely from view.
How to inspect the joint spec before the grouting crew starts
Check the spacers before mortar sets. Walk the site with a torch when the bedding mortar is still green, roughly four to six hours after laying. Spacers should be uniform, sitting evenly at tile intersections. Tap random tiles lightly with a nylon-headed inspection hammer; any tile that sounds hollow right after laying indicates bad adhesive bedding, not a joint problem.
Inspect the joint trench. Before the grouting team opens a single grout packet, make them run a utility blade or plastic spacer scraper through every single joint line. The adhesive or cement mortar that squeezes up during bedding must be cleared out to a depth of at least 5mm to 6mm. If the gap is choked with bedding mortar, the grout has nowhere to anchor.
Check the product packaging on the floor. Verify that the grout bags state polymer-modified or unsanded tile joint filler. For joints between 1mm and 3mm, fine-aggregate unsanded or lightly sanded polymer grouts are mandatory. If you see bags of plain white cement or wall putty stacked near the mixing bucket, stop the work immediately.
Joint Systems for Vitrified Floors
| Property / Parameter | Paper Joint (Butt Joint) | 2mm Spacer Joint |
|---|---|---|
| Thermal expansion relief | Zero relief; transmits compressive stress directly across tile rims | High relief; polymer grout absorbs seasonal contraction and expansion |
| Water resistance | Fails; dirty mopping water seeps beneath unsealed micro-gaps | Superior; sealed with hydrophobic, polymer-rich grout matrix |
| Edge chipping risk | Extremely high under point loads and foot traffic | Low; grout cushions tile edges against localized deflection |
| Recommended tile type | None; unsafe for vitrified tiles above 300x300mm | All vitrified tiles (600x600, 600x1200, 800x1600mm) |
| Site labour tolerance | Requires perfect tile calibration; shows up any edge warpage immediately | Accommodates minor dimensional tolerances allowed under IS 15622 |
| Long-term repair risk | High likelihood of winter tenting and tile replacement bills | Practically zero tenting risk when perimeter gaps are maintained |
Which one to buy
- Specify minimum 2mm spacers in your contract drawings for all vitrified tiles above 600x600mm.
- Order reusable or disposable leveling clips alongside standard 2mm plastic cross spacers to stop tile lippage.
- Enforce an 8mm clear perimeter perimeter expansion gap between the edge tiles and every masonry wall.
- Reject dry white cement powder; procure polymer-modified cementitious tile grout matching your tile shade.
- Ensure all joint channels are cleaned free of squeezed bedding mortar before grout application begins.
Compare current options and place orders onMadoverbuildings (MOB).
Don't substitute these
- Never let the tiler use broken tile pieces or folded cardboard strips as makeshift spacers; cardboard swells when wet and ruins joint consistency.
- If laying tiles across a room larger than 6 meters in length, install a dedicated movement control joint filled with polyurethane sealant.
- Always keep two extra boxes of your floor tile batch safely stacked; if a paper joint floor pops, finding the exact shade run a year later is impossible.
How This Plays Out on Madoverbuildings (MOB)
A residential contractor finishing a 3BHK flat in Whitefield noticed his tiling team had laid the hall using paper joints despite the vitrified slab spec. Knowing the winter cold snap would buckle the floor, he logged onto Madoverbuildings (MOB), verified ready stock for 2mm tile leveling clips and polymer-modified floor grout, and booked a delivery slot to reset the work before the adhesive set.
Frequently Asked Questions
Can vitrified tiles be laid without spacers?
No, vitrified tiles should never be laid without spacers. Because vitrified tiles have an extremely low water absorption rate under 0.05 percent, they do not expand through moisture but experience significant thermal expansion. Without spacers to cushion thermal movement, the lateral stress forces the tiles to buckle and tent off the floor.
Why do Bengaluru apartment floors pop up mostly in winter?
Bengaluru winters feature wide day-to-night temperature swings, often shifting from 30 degrees Celsius during sunny afternoons to 14 degrees at night. This rapid temperature cycling causes unequal contraction between the cold RCC slab and the vitrified tile surface. In paper joint installations with zero expansion relief, the resulting shear stress breaks the mortar bond and buckles the floor.
Which tile spacer size is best for 600x1200mm vitrified tiles?
A 2mm spacer is the industry standard for 600x1200mm vitrified tiles laid indoors. It provides adequate joint volume for polymer grout to anchor properly while remaining narrow enough to maintain a modern, clean visual appearance. For outdoor balconies exposed to direct sun, increase the spacer width to 3mm or 4mm.
What is the difference between paper joint and spacer joint?
A paper joint places tiles edge to edge with zero deliberate gap, relying on thin cement slurry that barely penetrates the seam. A spacer joint uses calibrated plastic cross pieces to enforce a uniform 2mm to 3mm channel that is later packed with polymer-modified grout. The spacer joint absorbs building movement and prevents tile edges from chipping under traffic.